Brioche

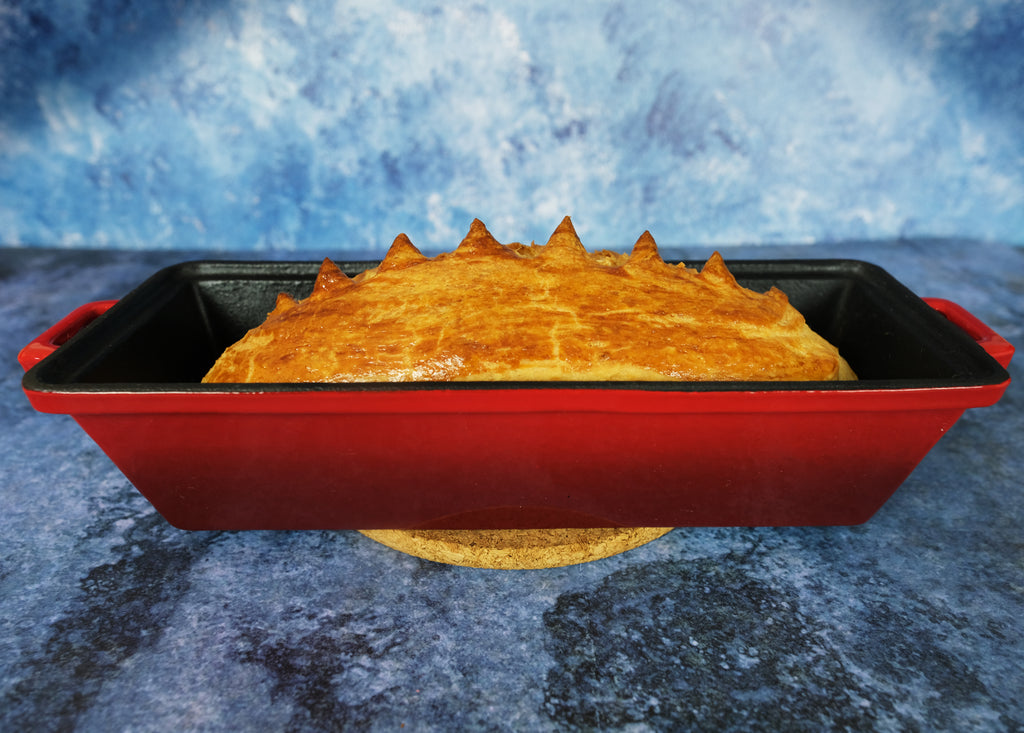
La brioche est un pain délicieux, beurré et moelleux, parfait pour le petit-déjeuner, le brunch ou en accompagnement d'un repas copieux. La forte teneur en matières grasses du beurre utilisé dans la recette donne au pain sa texture riche et feuilletée. Le temps de fermentation long et le processus de levée lente permettent également le développement d'un profil de saveur complexe et nuancé qui ne peut être obtenu avec des recettes de pain rapide. Avec sa belle croûte dorée et son intérieur tendre et moelleux, la brioche est un incontournable pour tous les amateurs de pâtisseries.
Ingrédients
- 1 paquet (2½ c. à café/7 g) de levure sèche active
- 2 c. à soupe d'eau tiède
- 250 g (2¼ bâtonnets/9 oz) de beurre non salé à haute teneur en matières grasses, à température ambiante, coupé en morceaux de la taille d'une bouchée (si votre cuisine est très chaude, compensez en utilisant du beurre frais), plus un peu pour beurrer les bols et les moules
- 500 g (3⅔ tasses) de farine tout usage, plus un peu plus pour les surfaces de travail
- 55 g (¼ tasse) de sucre
- 7,5 g (1¼ c. à café) fine
- sel de mer
- 5 gros œufs, à température ambiante, cassés dans un bol moyen, plus 1 œuf pour la dorure
Note : LE RENDEMENT produit deux pains de 9 x 5 pouces. La recette ne doit pas être divisée en deux. Si vous ne souhaitez pas cuire deux pains en une journée, congelez la moitié de la pâte ou conservez-la au réfrigérateur pendant deux à trois jours.
Vous aurez besoin de suffisamment de pâte pour faire deux pains pour cette recette.
Instructions
- Activez la levure. Fouettez la levure avec deux cuillères à soupe d'eau tiède (pas chaude) dans un petit bol avec une fourchette. Laissez reposer environ 2 minutes jusqu'à ce que ça mousse. Donnez un coup de fouet rapide à la levure avec la fourchette après deux minutes. Elle est activée si elle est mousseuse. Sinon, recommencez avec un nouveau lot de levure et d'eau encore tiède.
- Beurrez bien deux grands bols en verre avec un pinceau ou un essuie-tout imbibé de beurre à température ambiante. Mettez de côté.
- Mélangez la farine, le sucre, le sel et la levure activée dans le bol d'un batteur sur socle équipé de l'accessoire palette. Couvrez le mélange de levure activée avec un peu de farine et placez-le d'un côté du bol pour éviter qu'il ne touche le sel.
- Mélangez à basse vitesse pendant environ 30 secondes jusqu'à ce que tous les ingrédients soient bien combinés et que la consistance soit uniforme. Raclez les parois du bol avec une spatule en caoutchouc.
- Ajoutez cinq œufs et mélangez à basse à moyenne vitesse jusqu'à ce que la pâte se forme et que presque tous les ingrédients soient incorporés (pas plus de trois à quatre minutes). Lorsque la pâte devient difficile à mélanger avec le batteur sur socle, il est temps d'ajouter le beurre.
- Fixez le crochet pétrisseur après avoir retiré l'accessoire palette.
- Ajoutez le beurre à la pâte en trois à quatre fois avec le mixeur à basse vitesse, en vous assurant que le beurre de l'ajout précédent a presque disparu. Si nécessaire, incorporez la pâte avec une spatule en caoutchouc. Évitez de trop travailler la pâte car cela ferait que le beurre se sépare et devienne huileux. Mélangez à vitesse basse à moyenne pendant encore 10 à 12 minutes, ou jusqu'à ce que la pâte se détache des parois du bol et soit brillante et lisse. La pâte doit offrir une certaine résistance au toucher et ne pas coller à vos mains.
- Farinez légèrement la surface de travail. Utilisez une spatule en caoutchouc ou un racloir de table pour transférer la pâte sur la surface de travail. À l'aide d'un racloir, divisez la pâte en deux. Après avoir légèrement fariné vos mains, utilisez le racloir pour lancer doucement la pâte autour de la surface de travail et dans votre main libre afin de former deux formes de boules.
- Placez la pâte dans les bols beurrés avec précaution. Couvrez chaque bol d'un torchon propre et laissez reposer à température ambiante (20°C à 25°C / 68°F à 77°F) sans courants d'air. Laissez la pâte lever pendant deux à deux heures et demie, mais pas plus. La pâte doit avoir une surface lisse et une certaine résistance, et elle doit être jaunâtre.
- Beurrez bien deux moules à pain de 9x5 pouces avec un pinceau ou un essuie-tout imbibé de beurre à température ambiante. Mettez de côté.
- Farinez légèrement vos mains et la surface de travail. Transférez délicatement la pâte sur la surface farinée avec vos mains, une spatule en caoutchouc ou un racloir de table.
- Formez une des boules de pâte. Aplatissez la pâte en une forme oblongue de la même longueur que le moule à pain, avec le bord long face à vous, en travaillant horizontalement à travers la pâte avec une main. Pendant que votre autre main aplatisse avec le talon, soutenez délicatement la pâte avec votre main libre tout en maintenant sa position.
- À environ 1,5 cm de chaque côté, repliez les bords courts de la pâte vers le centre pour qu'ils deviennent droits plutôt qu'arrondis. Pressez légèrement les coutures avec vos doigts, ramenant la pâte à la longueur du moule.
- Avec vos pouces pointant vers vous et vos index touchant le bord éloigné de la pâte, posez vos paumes à plat sur le plan de travail. Roulez la pâte en mouvement circulaire vers vous et formez un boudin en repliant les bords avec vos pouces.
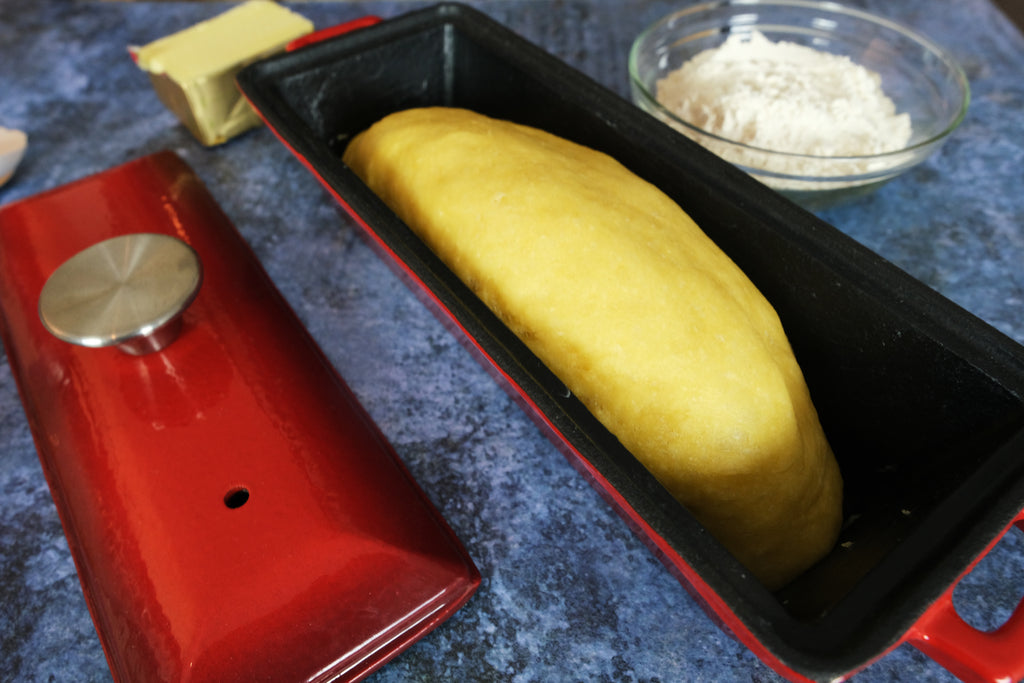
- Soulevez délicatement le boudin de pâte et placez-le couture vers le bas dans le moule préparé, en soutenant le centre plus lourd. La deuxième boule de pâte subira la même procédure de façonnage.
- Pour éviter tout mouvement inutile qui pourrait endommager la pâte, couvrez les deux moules avec un linge propre et placez-les dans un endroit à l'abri des courants d'air, idéalement sur votre plan de travail. Utilisez un sac plastique pour couvrir les moules si votre cuisine est exposée aux courants d'air. Laissez les miches lever jusqu'à ce que la pâte atteigne le haut du moule ou juste au-dessus, environ 1½ à 2½ heures. En vérifiant la pâte, essayez de ne pas retirer le linge car cela créerait un courant d'air. Vérifiez plutôt si le linge a gonflé.
- Placez une grille dans le tiers inférieur du four et préchauffez-le à 350°F/180°C lorsque la pâte a principalement levé.
- Préparez la dorure. Battez l'œuf restant dans un petit bol. Badigeonnez une très fine couche de dorure sur le dessus de chaque miche avec un pinceau à pâtisserie, en faisant attention à ne pas trop saturer la pâte, ce qui pourrait faire dégonfler la miche ou brûler le dessus du pain pendant la cuisson.
- Faites une incision au milieu de la miche avec des ciseaux de cuisine propres. Utilisez le rebord du moule comme appui pour les ciseaux avec votre main libre. Faites de petites entailles le long de la longueur du pain en guidant votre main horizontalement sur la miche. Pour permettre à la pâte de s'étendre autour des marques de coupe, couvrez-la et laissez-la lever 3 à 5 minutes sur le plan de travail. Sautez cette étape et enfournez votre miche sans entailler si la pâte a trop levé.
- Faites cuire les miches pendant 35 à 40 minutes, ou jusqu'à ce qu'elles soient d'une couleur terre cuite claire, dorée ou orange. Pendant la cuisson, évitez d'ouvrir la porte du four car cela pourrait faire s'effondrer le pain.
- Laissez la brioche dans le moule pendant environ deux minutes, jusqu'à ce que la surface soit juste assez fraîche pour être touchée. Pour démouler le pain, retournez-le délicatement d'une main. La miche doit refroidir au moins une heure sur une grille.
- Placez le pain dans un linge puis dans un sac en papier où il peut être conservé pendant cinq à sept jours à température ambiante. Si vous le congelez, attendez que le pain soit complètement refroidi. Il peut être conservé jusqu'à trois mois dans un sac de congélation. Lorsque vous êtes prêt à l'utiliser, laissez la miche décongeler à température ambiante.


Le moule à pain en fonte émaillée visible sur ces images se trouve ici.
SAUVEGARDER UNE RECETTE POUR PLUS TARD ?
Si vous souhaitez sauvegarder cette recette pour plus tard, vous pouvez l'imprimer, ajouter la page aux favoris ou l'enregistrer sur Pinterest.
Comment imprimer une recette sans les images
- Aller à https://www.printfriendly.com/
- Entrez le lien de la recette dans le champ de saisie et cliquez sur le bouton "Aperçu".
- Dans l'aperçu, survolez l'élément que vous ne souhaitez pas imprimer (images ou autres éléments) et cliquez sur le symbole de la corbeille pour le supprimer.
- Lorsque vous avez terminé, cliquez sur le bouton d'impression.


Laisser un commentaire