Dip ·
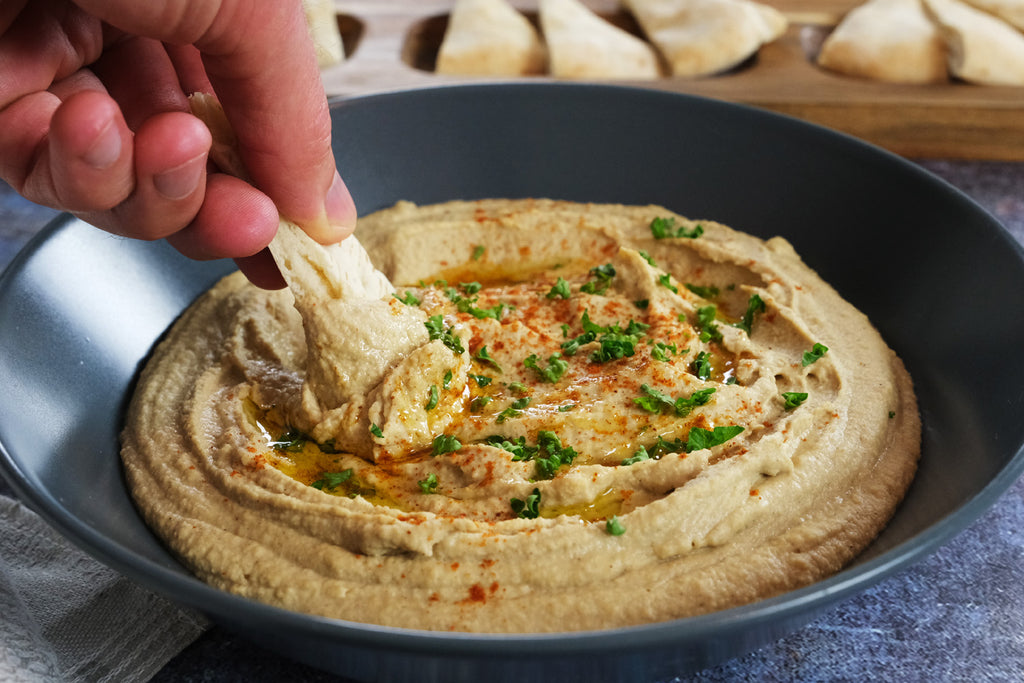
Enkel hjemmelaget hummusoppskrift

8 porsjoner
Ingredienser
- 1 boks (425 gram/15 oz/1 ½ kopper) kikerter, skylt og drenert
- ½ ts natron (valgfritt)
- 1/4 kopp sitronsaft
- 2 hvitløksfedd, presset
- 1/2 - 1 ts havsalt
- 1/2 kopp tahini
- 2 - 4 ss vann
- 1/2 ts malt spisskummen
- 1 ss ekstra virgin olivenolje
- Til pynt: en skvett olivenolje, et dryss malt paprika eller sumak, hakket fersk persille
Instruksjoner
- I en kjele, tilsett kikerter og fyll deretter kjelen med vann og la det småkoke. La det småkoke i omtrent 20 minutter, sil deretter kikertene i en sil. Dette steget er valgfritt med hensikt å skape et jevnere resultat.
- I mellomtiden, bland sitronsaft, hvitløk og salt i en food processor og la det hvile i omtrent 10 minutter.
- Tilsett tahinien i processoren og bland til blandingen er tykk og kremet. Skrap ned tahinien fra sidene med en slikkepott om nødvendig.
- Tilsett 2 ss vann og bland til glatt og kremet, tilsett 1-2 ss mer hvis du ønsker en tynnere konsistens.
- Tilsett spisskummen og kikerter i food processoren og bland til det er veldig glatt. Mens du blander, tilsett olivenolje. Skrap ned sidene av processoren med en slikkepott om nødvendig.
- Sjekk konsistensen; hvis du vil ha mer vann kan du tilsette en spiseskje om gangen.
- Bland i omtrent 2 minutter eller mer avhengig av hvor glatt hummus du ønsker. Smak til med salt.
- Server i en bolle og pynt med dine favorittoppinger.


LAGRE EN OPPSKRIFT TIL SENERE?
Hvis du vil lagre denne oppskriften til senere, kan du skrive den ut, bokmerke siden eller lagre den på Pinterest.
Hvordan skrive ut en oppskrift uten bildene
- Gå til https://www.printfriendly.com/
- Skriv inn lenken til oppskriften i inndatafeltet og klikk på "Forhåndsvisning"-knappen.
- I forhåndsvisningen, hold musepekeren over elementet du ikke vil skrive ut (bilder eller andre elementer) og klikk på søppelbøtte-symbolet for å fjerne det.
- Når du er ferdig, klikk på utskriftsknappen.


Legg igjen en kommentar